Saturday, June 14, 2014

Ceilings: Painted!

One more thing to cross off the list! After scraping the ceilings, we happily discovered that they were in great shape as-is in most rooms. This means we don't have to texture them at all--we could just paint right over them. Score!

The only rooms that require some texturing (due to flaws in the ceiling) are the bedrooms. Nick's dad was able to bust out the Master bedroom in under an hour with light texturing and it looks great! We just painted right over it after a couple days of drying. We still have the other two bedrooms to go, but those are a lower priority because we aren't using them much right now. 

Nick used a roller on the ceilings with flat white ceiling paint and then we went back and cut in later. The paint makes such a difference! Our ceilings feel at least 6 inches higher now and all our rooms look lighter and brighter. It was a labor-intensive project, but removing the popcorn and painting the ceilings added major equity to the house and makes us feel more comfortable in our home too. :) 

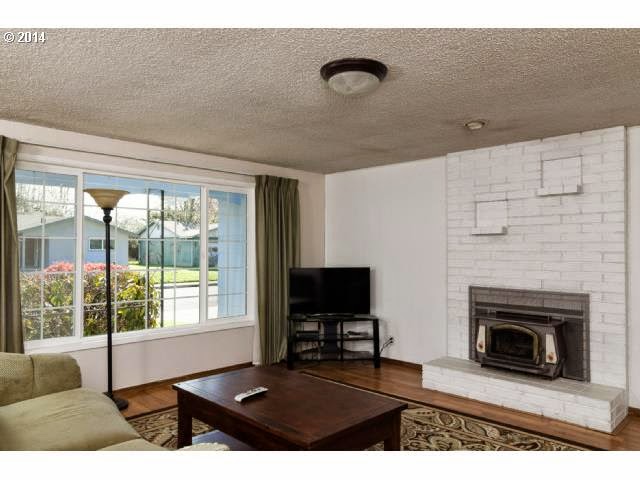
Take a look at the before and after:
In the last week we also made our own curtain setup and bought a big rug for the living room (both shown above). For the curtains we ended up spray painting electrical conduit ($3 for 8ft) and used fabric drop cloths as curtains with little curtain clips to hold them up. I still need to iron and hem them but they look great so far! We purchased the rug after selling our old washer and dryer. It was nice to not have to fork over any extra money for a big item on our list. Our little home is coming along!


Goodbye Post-it Yellow!

Moving into our new home, Nick's biggest priority was to get our ceilings scraped. Check! My biggest priority? Getting rid of that faded neon yellow in our kitchen. The yellow walls combined with the bright blue corian countertops was unsettling to say the least. The listing photographer did a great job capturing the kitchen in a decent light, but I promise you that most of the time the walls looked post-it yellow. Blegh!
But, what color to paint? We've got a lot of different elements in our kitchen that make most colors a no-go. White cabinets, black appliances, and oh yeah--bright blue counters. That area of the house doesn't get a ton of natural light (yet-- we have big things planned for that space), so it couldn't be too dark. We concluded that some sort of gray was the best option for the space as it's neutral and can help to coordinate all the different elements. The internet is obsessed with Revere Pewter by Benjamin Moore-- it's touted as a warm gray that goes with any color scheme. Bingo! The gal at Benjamin Moore gave us some suggestions and taught us how to look for different undertones in each color by placing it next to the blue counters. She agreed that Revere Pewter looked best as it lacks any heavy purple/green/yellow undertones that are all too common with shades of gray. 

While Nick started painting our ceilings, I got to work cutting in with our new kitchen color. At first it looked purple to me, but I'm pretty sure that was a combination of the yellow bouncing off the walls and my eyes playing tricks on me. Take a look at the difference! 


My iPhone pictures don't do the room justice compared to the pro's photos, but at least the YELLOW IS GONE! 


Here's our to-do list for the kitchen and dining areas:

Phase 1
-Paint walls!
-Knock out wall between dining area and living room
-Replace or paint ceiling lights in kitchen and dining area (get rid of the gold!)
-Install new baseboards
-Add crown moulding

Phase 2:
-Add a butcher block counter extending from the peninsula for barstool seating (I LOVE the idea of this)
-Replace black appliances with stainless steel or white (this could be 5+ years out for us... our current appliances are perfectly functional and the only reason we'd want to switch them out is for aesthetic purposes, so this is a low priority)

Friday, June 6, 2014

Ceilings: Scraped!

Well, we survived! Nick and I met his parents at the house last night around 5:30 and got to work quickly. The prep work took some trial and error at first... The tutorials say to tape the plastic on the wall, close to the ceiling and drape plastic on the floors before wetting the popcorn. What they don't tell you is that said tape loses it's stick when wet and drops all the plastic to the floor! What we ended up doing was spreading out a giant sheet of plastic on the floors and tape it to the wall on all edges, just above the baseboards. It was a messier job but saved a lot of plastic.

The entire project took us just over 6 hours to complete. Our whole house is now popcorn free! 


Next on the list is texturing/painting the ceilings. The ceilings are in great condition and don't have a lot of flaws, so Nick's mom suggested that we use a textured paint roller in lieu of spreading around joint compound. It'll save us a lot of time and will be a more subtle look, which is exactly what Nick and I are going for.

Wednesday, June 4, 2014

Projects Aplenty

Tomorrow the little blue house is officially ours! We'll be taking a couple days to tackle a very messy project before moving in: scraping popcorn ceilings. Nick has ordered us some fancy HAZMAT-looking suits complete with respirators and googles. They're actually designed for this project and supposedly the pros use the same ones. Anything to prevent poison from getting into our lungs! 
These are pictures from the original MLS listing. The photographer did a great job, but you can see how the ceilings feel low and make the room look darker. Scraping the ceilings, adding a bit of texture and a fresh coat of white paint should help to brighten up the room a bit.  

Unfortunately the wood-burning stove had to come out as it is not EPA certified. Big bummer for us! Now there's just a gaping hole in its place. We're hoping to replace it with a gas insert or a newer wood stove by next winter. 
Our official "phase 1" plans for the living room so far are:
- Scrape popcorn ceilings
- Texture and paint ceilings
- Remove old school paneling from wall next to fireplace
-Paint the walls a light/neutral color (in person these walls have a peach/rose hue that we don't love)
- Expand the doorway between the kitchen and dining area by knocking out 5 ft of wall (we'll most definitely need Nick's dad's help on this one as it is likely a load-bearing wall and involves installing a giant header)
- Insert matching laminate flooring where said wall used to be
- Replace curtains with something lighter in color and texture (the curtains that the sellers left are heavy and pretty old school. We think they also darken the room a bit.)
- Add a large area rug (we love this one from Home Depot-- it looks even happier in person)
-Hang art on the walls

For "phase 2" here are our thoughts:
- Cover up the brick fireplace with drywall/tile/moulding 
- Add a mantel 
- Hang TV above mantel on fireplace
- Find a way to hide all cords! 
-Change out the dated baseboards 
-Install crown moulding 

Due to our limited budget we've decided to tackle each room in phases (as inspired by my long-time favorite people at Young House Love). Phase 1 includes what we think are the more urgent items as well as projects that are more affordable to tackle in the beginning (e.g. painting the walls). Phase 2 involves more time-consuming/extensive work or pricier projects that we'll be able to budget for in the future. We'll likely have a phase 1 and 2 for the living room, kitchen, and backyard. The other rooms of the house won't set us back too much if we tackle them all at once. 

Three cheers for DIY!